Views: 0 Author: Site Editor Publish Time: 2025-09-10 Origin: Site


You use an oxy acetylene welding torch by following strict safety procedures and making sure your setup is correct every time. Always put on protective gear like gloves, goggles, and flame-resistant clothing before you start. Many accidents happen when people skip steps or ignore warnings. Some common incidents include regulator fires, smoldering cables, and nozzle heads coming loose.
| Incident Description | Details |
|---|---|
| Acetylene tank regulator fire | Flames observed at the regulator due to improper use of thread sealing tape. |
| Smoldering welding cable | Cable pinched and insulation cut, exposing wires. |
| Detached nozzle head | Nozzle head found detached from the torch. |
| Severe burn incident | Welder burned due to oil on hand and oxygen leak causing fire. |
Stay alert and follow each instruction to protect yourself and ensure your welding torch operates safely.
Always wear protective gear like gloves and goggles before using the torch to prevent injuries.
Store oxygen and acetylene cylinders upright and at least 20 feet apart to reduce fire risks.
Inspect cylinders for damage and ensure they have current hydrostatic test dates before use.
Attach regulators and hoses carefully, checking for leaks with soapy water before lighting the torch.
Use the correct pressure settings for your welding tip to ensure a stable flame and safe operation.
Choose the right nozzle size based on the thickness of the metal to achieve quality welds.
Follow a precise shutdown procedure to prevent gas leaks and extend the life of your equipment.
Regularly maintain and inspect your welding equipment to ensure safety and efficiency.
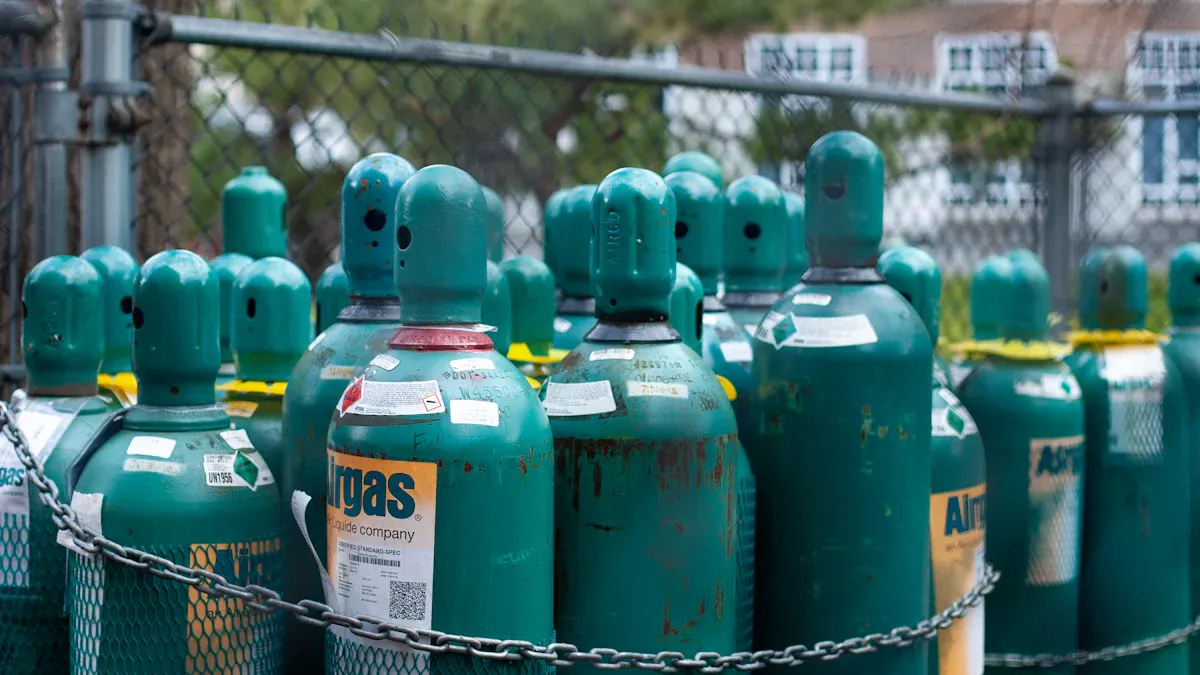
Setting up your oxy acetylene cylinders correctly is the first step to safe welding. You must pay close attention to where you place the cylinders, how you inspect them, and how you secure them. Each step helps prevent accidents and keeps your workspace safe.
Choosing the right location for your cylinders is essential. You need to keep them in a spot that reduces risks and follows safety guidelines.
Always place your cylinders in a well-ventilated area. Good airflow helps prevent the buildup of dangerous gases. Outdoor storage works best, but if you must store cylinders indoors, pick a spot with plenty of fresh air. Never keep cylinders near heat sources or direct sunlight. Heat can increase pressure inside the cylinder and cause leaks or explosions.
Tip: A dry, open space with no clutter makes it easier to spot leaks or damage.
Keep your cylinders upright at all times. Laying them on their sides can cause the gases to mix improperly or leak. Secure the cylinders so they cannot tip over. Place oxygen and acetylene cylinders at least 20 feet apart, or use a noncombustible barrier between them. This separation lowers the risk of fire if a leak occurs.
| Safety Guideline | Description |
|---|---|
| Ventilation | Store cylinders in a well-ventilated area, preferably outdoors. |
| Separation | Keep oxygen cylinders at least 3 meters (about 10 feet) from fuel gas cylinders, or use a fire-resistant barrier. |
| Storage Position | Always store cylinders upright and secure them. |
| No Smoking | Mark the area as 'No Smoking' to prevent fire hazards. |
Before you use any cylinder, inspect it carefully. Look for signs of damage, rust, or leaks. Check the hydrostatic test date stamped on the cylinder. The date should be within the last five years. Make sure the cylinder has a proper label, including the DOT identification number, serial number, and maintenance date. Hand-tighten the caps and valves. Never use tools to force them. If you find any problems, do not use the cylinder.
Check for dents, rust, or oil on the cylinder.
Confirm the hydrostatic test date is current.
Make sure valve caps and protection covers are in place.
Verify labels and identification numbers.
Ensure valves are closed on empty cylinders.
You must secure your cylinders to prevent them from tipping or rolling. Use sturdy chains, plastic-coated wire cables, or commercial straps. Attach the securing device tightly between half and two-thirds up the cylinder. The chain should be at least ¼ inch thick. Group cylinders by size to make securing easier. Do not overload the securing system.
Secure cylinders to a wall, bench mount, or cylinder rack.
Use double gas cylinder hand trucks with v-shaped supports for transport.
Place valve protectors on cylinders when not in use.
Separate cylinders with a firewall if possible.
Prevent unauthorized access to the storage area.
Note: Proper securing prevents accidents and keeps your workspace organized.
By following these steps, you create a safer environment for welding. You reduce the risk of leaks, fires, and injuries. Always check your setup before you start working.
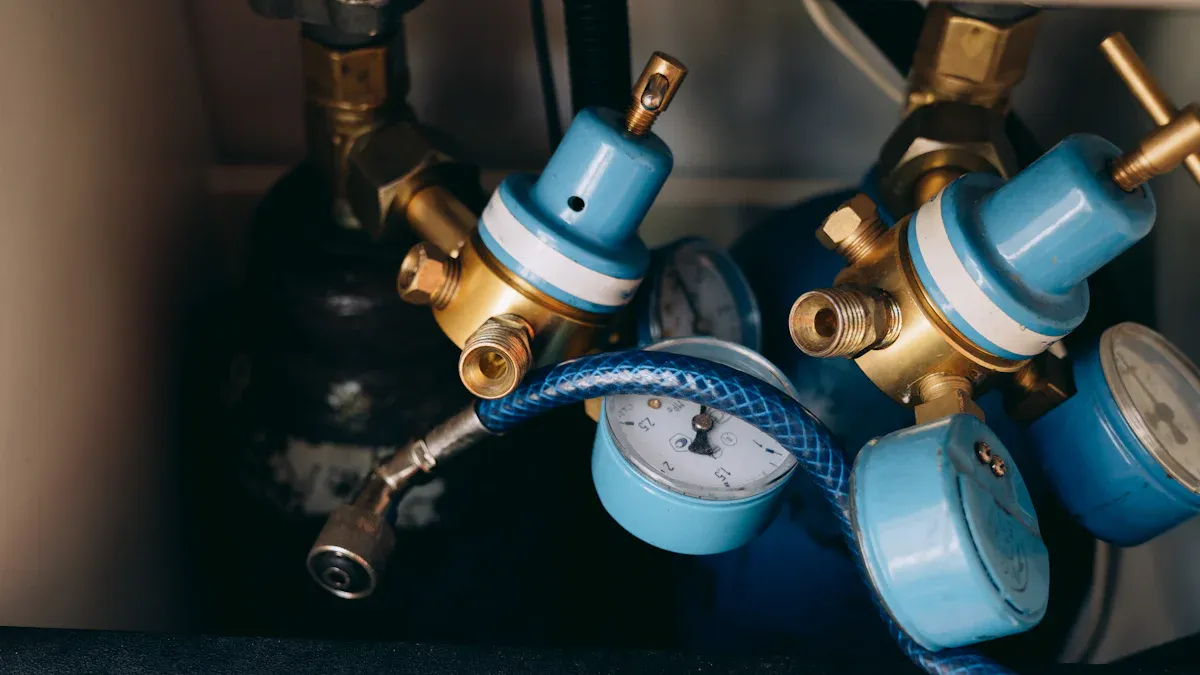
Attaching the regulators to your oxy acetylene cylinders is a critical step for safe welding. You must follow each step carefully to avoid leaks or accidents. Start by putting on your safety glasses and Kevlar gloves. This gear protects your eyes and hands from unexpected gas releases or sharp edges.
Briefly open the cylinder valves to clear away dust or debris. This step prevents particles from entering the regulator.
Make sure the pressure adjusting screw on each regulator is loose before you begin.
Attach the oxygen regulator to the green-marked oxygen cylinder and the acetylene regulator to the red-marked acetylene cylinder. Tighten the connections by hand.
Close the control valves on your welding torch before you open the cylinder valves.
Open the oxygen and acetylene cylinder valves slowly. For oxygen, turn the valve fully open. For acetylene, open it about three-quarters of a turn.
Check the pressure gauges on both regulators. Adjust the settings as needed for your welding job.
Tip: Always keep the regulators clean and dry. Oil or grease can cause dangerous reactions with oxygen.
Proper hose connection ensures a leak-free and safe operation. Inspect your hoses for cracks, wear, or damage before connecting them. Use the correct color-coded hoses: green for oxygen and red for acetylene. The green hose uses a right-hand thread, while the red hose uses a left-hand thread.
Make sure all connections are clean before attaching the hoses to the regulators.
Close both torch valves and set the regulator adjusting screws to the off position.
Attach the hoses securely to the regulators and the torch. Tighten the fittings by hand, then use a wrench for a snug fit.
After assembly, use an approved leak test solution or oil-free soapy water to check for leaks. If you see bubbles, tighten the connection or replace the part.
| Consequence | Description |
|---|---|
| Gas leaks | Leaking acetylene or oxygen can cause fires or explosions. |
| Explosions | High pressure or improper assembly increases the risk of acetylene explosion. |
| Serious injuries | Incorrect setup can result in burns or other injuries. |
Note: Inspect hoses every six months and regulators weekly if you use them often. Replace any damaged parts right away.
Setting the correct pressure for both gases is essential for a stable flame and safe welding. The pressure you need depends on the tip size you use. Always check your torch manufacturer’s recommendations.
| Tip Size | Acetylene Pressure (psig) | Oxygen Pressure (psig) |
|---|---|---|
| 1 | 1 | 1 |
| 2 | 2 | 2 |
| 4 | 10 | 40 |
| <1.5" | 10 | 40 |

Alert: Never exceed the recommended pressure settings. High pressure can cause dangerous gas decomposition or flashbacks.
By following these steps, you ensure your oxy acetylene welding torch operates safely and efficiently. Regular inspection and correct assembly protect you and your workspace from harm.
Before you begin welding, you need to prepare your welding torch carefully. This step ensures both safety and performance. You will learn about the main parts of the torch, how to select the right nozzle, and how to check for leaks.
Understanding the components of your welding torch helps you operate it safely and efficiently. Each part has a specific function. The table below shows the main components and their roles:
| Component | Function |
|---|---|
| Oxygen Cylinder | Holds compressed oxygen gas under high pressure. Needed for creating intense heat. |
| Acetylene Cylinder | Contains the fuel gas for welding. Filled with acetone for safe storage. |
| Pressure Regulators | Control gas flow from the cylinders. Reduce high pressure to safe working levels. |
| Welding Torch and Tips | Mix and burn gases. Allow you to control gas flow and attach different tips. |
| Hoses and Connections | Carry gases safely from regulators to the torch. Must be checked for leaks and damage. |
| Flashback Arrestors | Prevent flame from traveling backward. Stop flashbacks for safety. |
| Cylinder Cart | Help you move and store gas cylinders safely. Keep cylinders secured. |
Your welding torch uses a dual-gas design. It has adjustable valves for both oxygen and acetylene. You can attach detachable nozzles to match the thickness of the metal you want to weld. The ergonomic handle makes it comfortable to hold, even during long jobs. Safety features include built-in backflow prevention and compliance with ISO 5107 standards. Warning labels remind you to use the torch upright and keep it away from electromagnetic induction zones.
Tip: Always check that all parts are present and in good condition before you start.
Choosing the right nozzle for your welding torch is important for quality and safety. The nozzle size affects the flame shape, heat output, and gas usage. Follow these steps to select the correct nozzle:
Decide if you need a one-piece or two-piece nozzle. Use a one-piece nozzle for acetylene. Two-piece nozzles work well with other gases.
Pick the correct series for your application. Each series suits different tasks.
Check the preheat capacity. Match it to the material you plan to cut or weld.
Select the right size. The thickness of your metal determines the nozzle size. Larger nozzles waste gas if you use them on thin materials.
You should also consider:
The thickness of the steel or metal you want to cut or weld.
The type of cutting bore you need (cylindrical or high-speed).
The preheat gas you plan to use.
The type of cut (straight, shape, or bevel).
The material’s composition and surface scale.
As the plate thickness increases, you need a larger nozzle bore. This ensures the cutting stream stays strong and precise. Using a nozzle that is too large for thin metal can lower the quality of your work and waste oxygen.
Note: Refer to your welding torch manual for recommended nozzle sizes for each application.
Before lighting your welding torch, you must check for leaks. Gas leaks can cause fires, explosions, or health hazards. Follow these steps for a safe leak test:
Mix a solution of oil-free soapy water.
Apply the solution to all connections, including hoses, regulators, and the torch body.
Open the cylinder valves slowly.
Watch for bubbles at the connections. Bubbles mean a leak is present.
Tighten any loose fittings and repeat the test.
Replace any damaged parts if leaks continue.
Your welding torch includes safety features like check valves and flashback arrestors. These devices prevent gas from flowing backward and stop flames from reaching the cylinders. Always test these safety features regularly. Make sure you never exceed 15 psi for acetylene. Keep oxygen and acetylene separate until you are ready to light the torch.
⚠️ Alert: Never use oil or grease on any part of your welding torch. These substances can react with oxygen and cause a fire.
By preparing your welding torch properly, you protect yourself and ensure the best results for your welding projects.

Lighting your welding torch safely is essential for every project. You must follow each step carefully to avoid accidents and ensure a stable flame. Start by checking that all safety devices, such as check valves and flashback arrestors, are installed and working. These devices help prevent dangerous backflow and flashbacks.
Before you light the torch, always purge your hoses. This step removes any air or old gas from the lines. You do this by briefly opening each valve and letting the gas flow out. Keep the pressure below 15 psi when using acetylene.
Follow these steps to light your welding torch:
Open the acetylene cylinder valve first, turning it no more than three-quarters of a turn.
Back out the regulator to avoid high pressure.
Open the fuel gas valve on the torch about one-quarter turn.
Use a friction lighter or sparking tool to ignite the acetylene. Never use matches or cigarette lighters.
After the flame appears, slowly open the oxygen valve on the torch.
Adjust the oxygen valve until you achieve the desired flame.
Tip: Always keep your face and body away from the torch tip when lighting. Stand to the side for extra safety.
A neutral flame is important for most welding jobs. It gives you the right balance of heat and protects your metal from oxidation. You can adjust the flame by changing the oxygen and acetylene flow.
You will see three main flame types when using an oxy acetylene torch:
| Flame Type | Appearance | Use Case |
|---|---|---|
| Carburizing | Long, feathery inner cone | For adding carbon to metal |
| Neutral | Short, sharply defined white cone | Standard welding and brazing |
| Oxidizing | Shorter, pointed inner cone | For cutting or special alloys |
To set a neutral flame, follow these steps:
Light the torch with only the fuel gas valve open.
Slowly open the oxygen valve until the flame shows two clear zones: a bright white inner cone and a blue outer envelope.
Adjust both valves until the white cone is sharp and steady.
A neutral flame helps you achieve clean welds and prevents excess oxidation or carbon buildup.
You must always keep safety in mind during lighting and flame adjustment. Many accidents happen at this stage due to gas leaks or improper flame settings.
Store cylinders away from anything flammable.
Keep cylinders upright and secure at all times.
Inspect your equipment for leaks before every use.
Wear proper PPE, including safety glasses and flame-resistant clothing.
Make sure your workspace has good ventilation.
Common hazards include gas leaks from hoses or regulators and improper flame adjustment. Gas leaks can cause explosions if ignited. Incorrect flame settings may lead to backfires or flashbacks, which can damage your torch or cause injury.
⚠️ Alert: If you hear hissing or popping at the torch tip, shut off the gas immediately and check your connections.
By following these steps and tips, you create a safer environment and get the best results from your welding torch.
You can achieve strong and clean welds with an oxy acetylene welding torch by mastering a few basic techniques. Oxy-acetylene welding is popular among beginners because the process is straightforward. You heat the metal with the torch and can use filler rod if needed. The simple flame and gas flow settings help you learn quickly and produce quality welds.
Hold the torch at a slight angle to the workpiece.
Move the torch slowly and steadily along the joint.
Add filler rod by dipping it into the molten pool if the joint requires extra material.
Keep the flame adjusted to a neutral setting for most welding jobs.
Practice on scrap metal to improve your control and consistency.
Tip: You will improve your results with regular practice and training. Try different flame settings and torch angles to see how they affect the weld.
Always wear proper personal protective equipment (PPE) such as gloves, a welding hood, and flame-resistant clothing. OSHA standards require you to use PPE that matches the size and type of your welding job.
You can make clean and precise cuts with your oxy acetylene torch by following a few key steps. The correct cutting tip size and the right oxygen-to-fuel gas ratio are critical for good performance. Adjust the oxygen and fuel gas pressures to match the thickness of the metal.
Choose the right tip size for the metal you want to cut.
Support your cutting hand with your free hand to keep the torch steady.
Heat the steel until it reaches its kindling point before you start piercing.
Begin piercing in the center and work outward for best results.
Hold the torch so the inner cones of the flame are just above the cutting surface.
Roll the torch into the edge of the metal, then bring it perpendicular for thicker cuts.
Note: Always maintain a steady cutting speed. If you move too slowly, molten slag can build up and ruin the cut.
Store your welding torch and accessories in a safe place when not in use. Keep your workspace free of flammable materials and always have a fire extinguisher nearby.
You may encounter problems while using your welding torch. Knowing how to solve these issues helps you work safely and efficiently. Here are some common problems and solutions:
| Problem | Solution |
|---|---|
| Welding Stresses | Check joint design for rigidity. Allow parts to move during welding. Use proper welding procedure. |
| Warping of Thin Plates | Preheat material. Distribute heat evenly. Clamp parts properly. |
| Poor Weld Appearance | Use correct technique and rod manipulation. Ensure even heating. |
| Cracked Welds | Use recommended welding temperature. Allow for expansion. Use similar materials. |
If your torch fails to ignite or the flame is unstable, check for obstructions in the nozzle. Use the correct tip size and set the oxygen pressure according to the manufacturer’s charts. Maintain a steady speed when cutting to avoid problems with molten slag.
⚠️ Alert: Always perform a safety check before you start. Make sure your PPE is in good condition and your workspace is clear of hazards.
You can prevent most problems by inspecting your equipment regularly and following safe operating procedures. Keep your welding torch clean and store it properly after each use.
You must follow a precise shutdown process to keep your oxy acetylene welding torch safe and in good condition. Each step helps prevent accidents and extends the life of your equipment.
Turn Off Gas Supply with Precision: Close the oxygen valve on the torch handle first. Then close the fuel gas valve. This stops the flow of gases and prevents leaks.
Bleed Lines for Complete Discharge: Open both torch valves briefly. This action releases any trapped gases from the hoses and torch body.
Extinguish Flame Methodically: Snuff out any remaining flame using a safe method. Never blow out the flame or use your hand.
Close Torch Valves Securely: Make sure all valves are tightly closed. This step prevents gas from escaping when the torch is not in use.
Conduct Thorough Equipment Inspection: Check your torch, hoses, and regulators for signs of damage or wear. Look for cracks, abrasions, or loose fittings.
Secure and Store Equipment with Care: Coil hoses neatly and place the torch in a safe spot. Avoid sharp bends or kinks in the hoses.
Tip: Always use high-quality gases from trusted suppliers. Clean gases help your torch burn efficiently and reduce impurities.
A careful shutdown routine protects you from unexpected leaks and keeps your workspace safe. You also help your equipment last longer by preventing unnecessary wear.
Proper storage of your oxy acetylene welding equipment is essential for safety and performance. You need to keep cylinders, hoses, and torches in the right conditions to avoid accidents and equipment damage.
Store oxygen and acetylene cylinders separately. Keep at least 20 feet between them or use a noncombustible barrier.
Always keep cylinders upright. Secure them with chains, straps, or cylinder stands to prevent tipping.
Place valve caps on cylinders when not in use. This protects the valves from damage and keeps gas from leaking.
Choose a dry, well-ventilated area for storage. Avoid direct sunlight, heat sources, and extreme temperatures. Good ventilation is especially important for acetylene, which can leak and create explosive atmospheres.
Inspect hoses and connections regularly. Replace any that show signs of wear, cracks, or kinks.
Fit flashback arresters to both oxygen and fuel gas hoses near the regulators. These devices stop flames from traveling backward into the hoses.
Maintain your equipment in good condition. Clean the torch and check for loose parts before storing.
| Storage Practice | Why It Matters |
|---|---|
| Upright cylinder storage | Prevents gas mixing and leaks |
| Valve caps in place | Protects valves and prevents accidental release |
| Dry, ventilated area | Reduces risk of gas buildup and corrosion |
| Regular inspections | Identifies damage before it causes problems |
️ Note: Always inspect third-party or sub-contractor equipment before use. This step ensures all gear meets safety standards.
You keep your workspace safe and your equipment ready for the next job by following these storage guidelines. Regular maintenance and careful storage help you avoid costly repairs and dangerous situations.
You can use an oxy acetylene welding torch safely by following each step carefully. Always inspect your equipment, use proper storage, and wear protective gear. Create a checklist to help you remember important tasks:
| Key Point | Description |
|---|---|
| Equipment Inspection | Inspect hoses, regulators, cylinders, and torch for damage and ensure flashback arrestors are installed. |
| Proper Storage and Handling | Store cylinders upright, separate fuel and oxygen, and protect valves with caps. |
| Safe Operation Practices | Ensure proper ventilation, perform leak tests, and use correct lighting procedures. |
| Post-Operation Procedures | Properly shut down equipment, depressurize, and cool down materials. |
| Personal Protective Equipment | Wear flame-resistant clothing, gloves, safety glasses, and appropriate footwear. |
You can improve your skills by taking welding courses, reading manuals, and watching instructional videos. Many welders also share tips and experiences in online forums, which can help you learn new techniques.
You should wear flame-resistant gloves, safety glasses or a welding helmet, long sleeves, and closed-toe shoes. This gear protects you from sparks, heat, and harmful light.
Mix soapy water and apply it to all connections. If you see bubbles forming, you have a leak. Tighten the fittings or replace damaged parts before using the torch.
Some torches support both gases. Always check your torch’s manual. Acetylene burns hotter than propane, so you may see different results with each gas.
A neutral flame has a sharp, white inner cone. It provides balanced heat for welding without adding extra oxygen or carbon. This helps you make clean, strong welds.
Inspect hoses every six months and regulators weekly if you use them often. Look for cracks, leaks, or wear. Replace any damaged parts right away.
Turn off the torch valves immediately. Check for blockages, leaks, or incorrect pressure settings. Relight the torch only after fixing the problem.
Store cylinders upright in a dry, ventilated area. Secure them with chains or straps. Keep oxygen and acetylene cylinders apart. Place valve caps on cylinders when not in use.


